The Hero section in Blogsy lets you showcase your most important content at the top of the page, below the header (and ticker, if enabled).
You can either display a post slider or replace it entirely with the content of a specific page (blocks, patterns, or shortcodes).
Location #
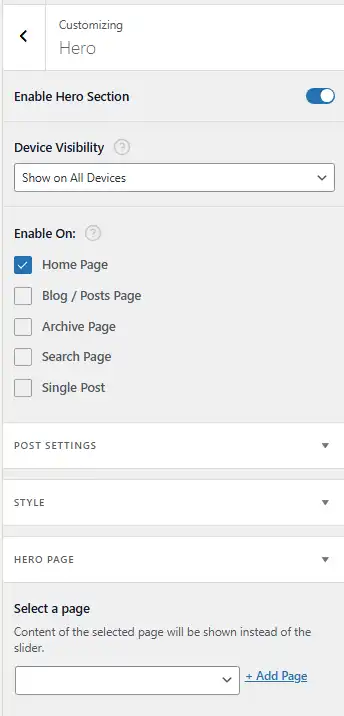
Go to Appearance → Customize → Hero.
All options for enabling the hero, choosing where it appears, selecting posts, styling, and replacing it with a page are available here.
Enable and visibility #
- Enable Hero Section
- Turn this on to display the hero area on your site.
- When disabled, the hero is hidden on all pages, regardless of other settings.
- Device Visibility
- Controls on which devices the hero is shown.
- Typical options: “Show on All Devices”, “Hide on Desktop”, “Hide on Tablet”, “Hide on Mobile”.
- Use this if you want a full hero only on desktop, or a simplified layout on smaller screens.
- Enable On
- Choose where the hero section should appear:
- Home Page
- Blog / Posts Page
- Archive Page
- Search Page
- Single Post
- You can enable multiple options to reuse the hero on several template types.
- Choose where the hero section should appear:
Post Settings (Hero Post Slider) #
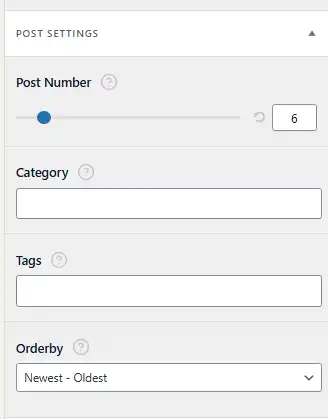
The Post Settings panel controls which posts are used in the hero slider.
- Post Number
- Sets how many posts are included in the slider (for example, 3, 5, or 6).
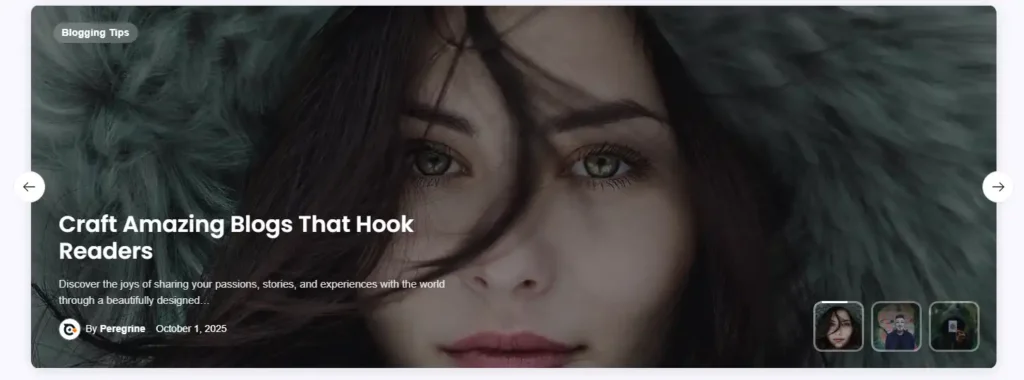
- Each slide displays the post’s featured image, title, meta and optional excerpt.
- Category
- Limit the slider to posts from specific categories (e.g., “Featured”, “Lifestyle”, “Animals”).
- Leave empty to use posts from all categories.
- Tags
- Further refine the selection using tags if you have a dedicated tag such as “hero” or “featured”.
- You can combine category and tag filters for precise control.
- Orderby
- Choose how posts are ordered in the slider:
- Newest – Oldest (default) to show the latest posts first.
- Other ordering options as provided by the theme (e.g., Oldest – Newest, Random etc.).
- Choose how posts are ordered in the slider:
Using these options, you can build a dynamic hero slider that always shows your most important or freshest content.
Style settings (Hero appearance) #
The Style panel controls the visual appearance of the hero slider.
- Height
- Adjusts the overall height of the hero area using a slider or numeric input (in pixels).
- A larger value creates a tall, immersive hero; a smaller value creates a more compact banner.
- Title Font Size
- Controls the font size of the hero post title.
- You can switch between px, em, and rem units, and adjust the slider to make the title more prominent or subtle.
- Post Elements
- Toggle individual elements inside the hero slide:
- Categories – Shows category badges at the top of the hero card (e.g., Animals, Lifestyle).
- Post Excerpt – Displays a short summary below the title.
- Post Meta – Shows meta information such as author name, date, and other single‑post meta you’ve enabled.
- Use the “eye” icons to show or hide each element, allowing you to design anything from a minimal hero (title only) to a rich magazine-style card.
- Toggle individual elements inside the hero slide:
- Excerpt Length
- When Post Excerpt is enabled, this value defines how long the excerpt can be.
- Increase the number for longer descriptions; decrease it for concise, one‑line intros.

These options work together to create the hero layout shown in your example screenshot, with a full‑width background image, categories, title, excerpt, and meta overlaid on top.
Hero Page – Replace slider with a page #
Instead of displaying the post slider, Blogsy lets you use the content of any existing page as the hero. This is ideal if you want a custom layout built with the block editor, patterns, or shortcodes.
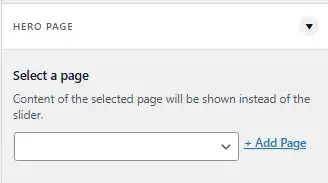
- Open the Hero Page panel.
- Select a page
- Choose a page from the dropdown.
- When a page is selected, the hero post slider is replaced completely with that page’s content on the templates where the hero is enabled.
- The selected page’s content can include:
- Block patterns from Blogsy or other plugins.
- Custom layouts built with core blocks (Columns, Cover, Group, etc.).
- Shortcodes from plugins (e.g., contact forms, sliders, opt‑in forms).
- + Add Page (link next to the dropdown)
- Quickly create a new page directly from the Customizer if you do not already have a dedicated hero page.
- After creating and publishing the page, you can edit it with the block editor to design your custom hero layout.
How the Hero Page works #
- The selected page’s content is rendered in place of the slider.
- If you clear the “Select a page” option (set it to empty), Blogsy falls back to the post slider based on your Post Settings.
Recommended usage patterns #
- Magazine / blog home
- Use the post slider with 3–6 posts filtered by a “Featured” category and keep Categories + Post Meta visible for a news-style look.
- Landing or branded homepage
- Create a dedicated page (e.g., “Homepage Hero”) with a custom block layout (headline, button, newsletter form) and select it as the Hero Page.
- This gives you full design freedom while keeping the rest of the Blogsy layout intact.
- Niche sections
- For category archives or the blog page, keep the post slider and filter by category/tag to highlight posts relevant to that section.
With the Hero section, Blogsy lets you choose between an automatically updated featured post slider and a fully custom hero built with the block editor, giving you flexibility for both simple blogs and more advanced magazine or landing page layouts.