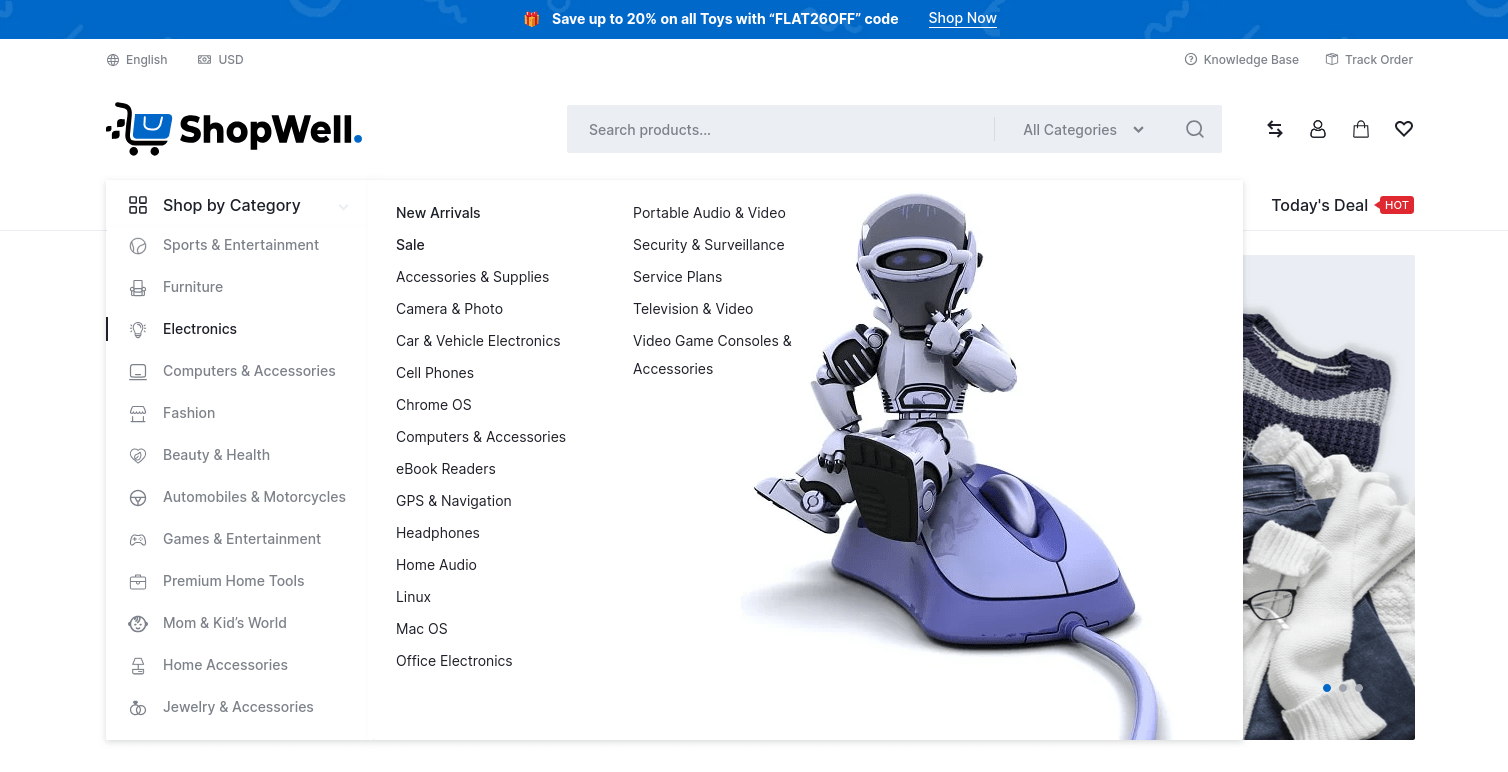
The ShopWell Addons provide advanced mega menu functionality. This allows you to create complex menu structures with columns, rows, icons, images, and widgets — perfect for showcasing categories, products, or promotions.
⚙️ Mega Menu Settings #
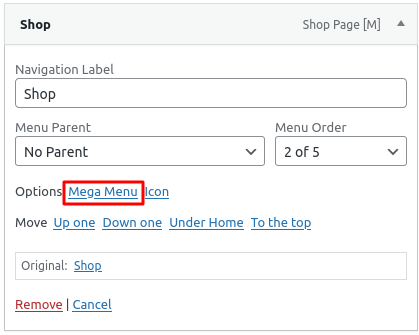
To configure a mega menu, go to:
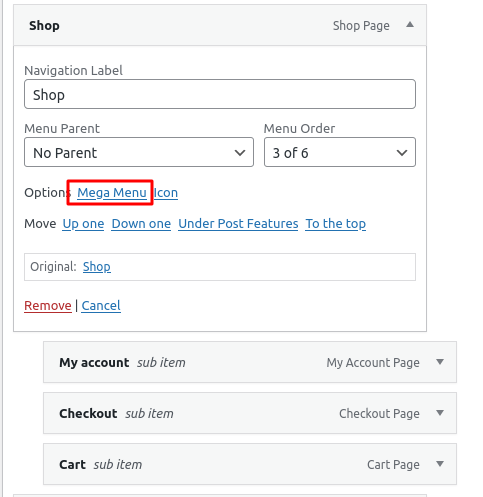
Appearance → Menus
Select the menu item ( Top Level ) you’d like to turn into a mega menu, then click the Mega Menu button.
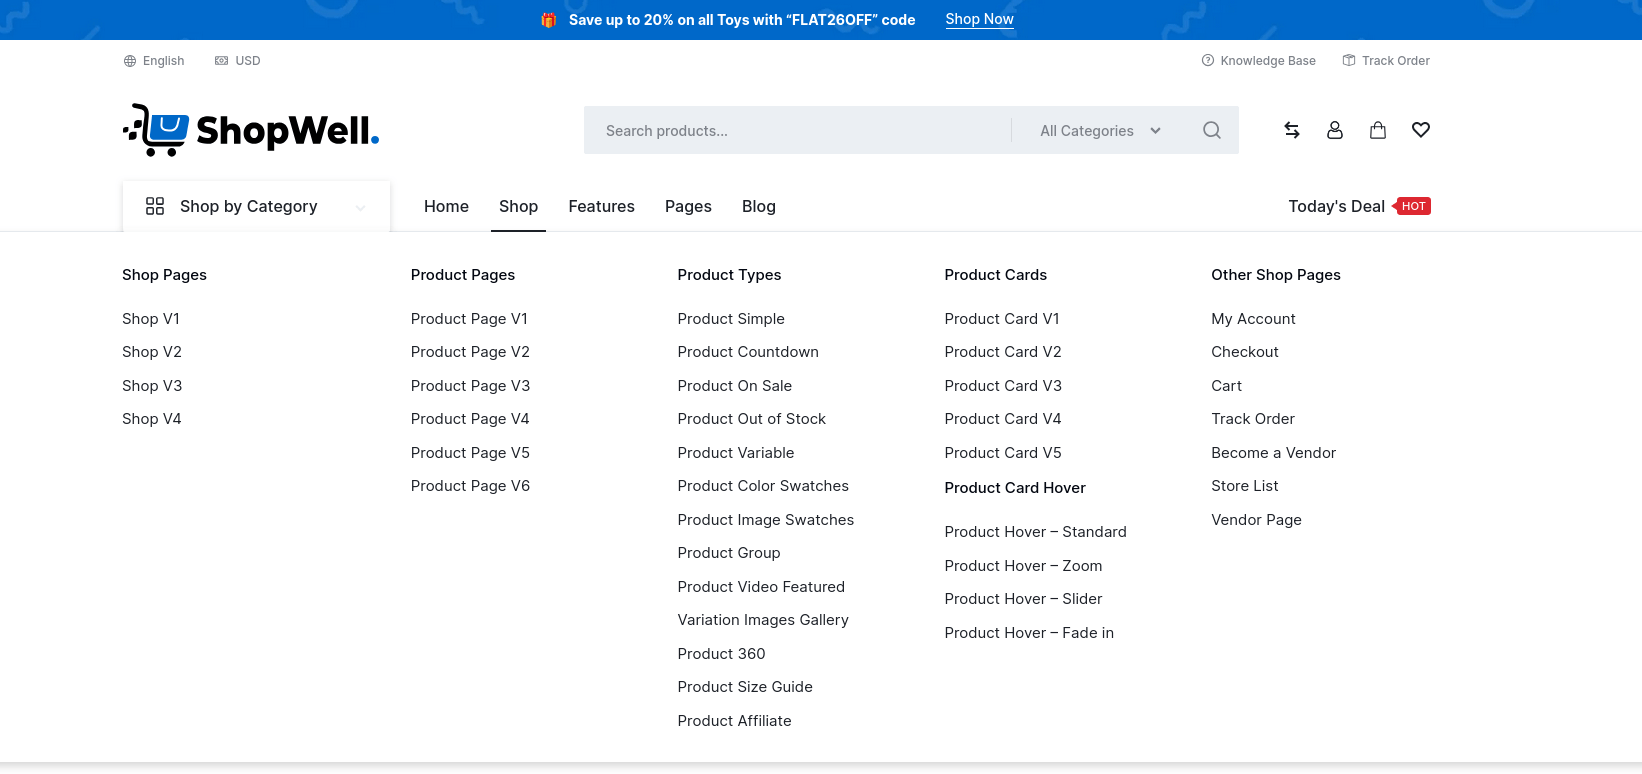
Mega Menu Content #
Mega Menu Tab #
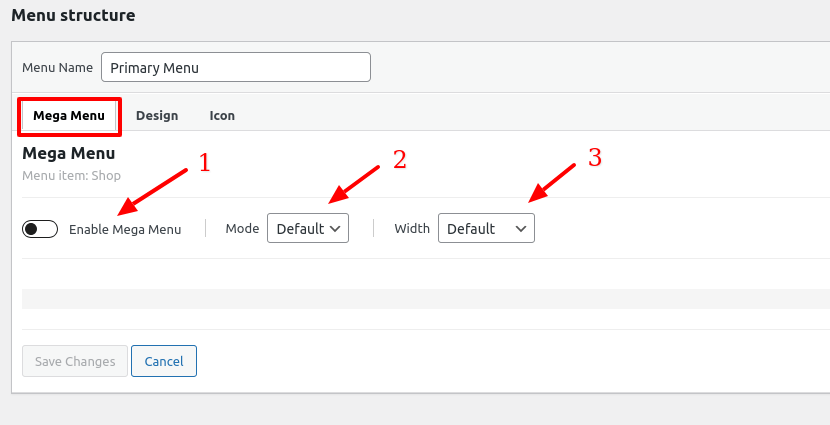
Steps:
- Enable Mega Menu: Check the option to activate it for that menu item.
- Mode: Choose the layout style — e.g., Default, Grid or Tab.
- Width: Default, Full Width & Custom.
Mega Menu Mode ‘Grid’ #
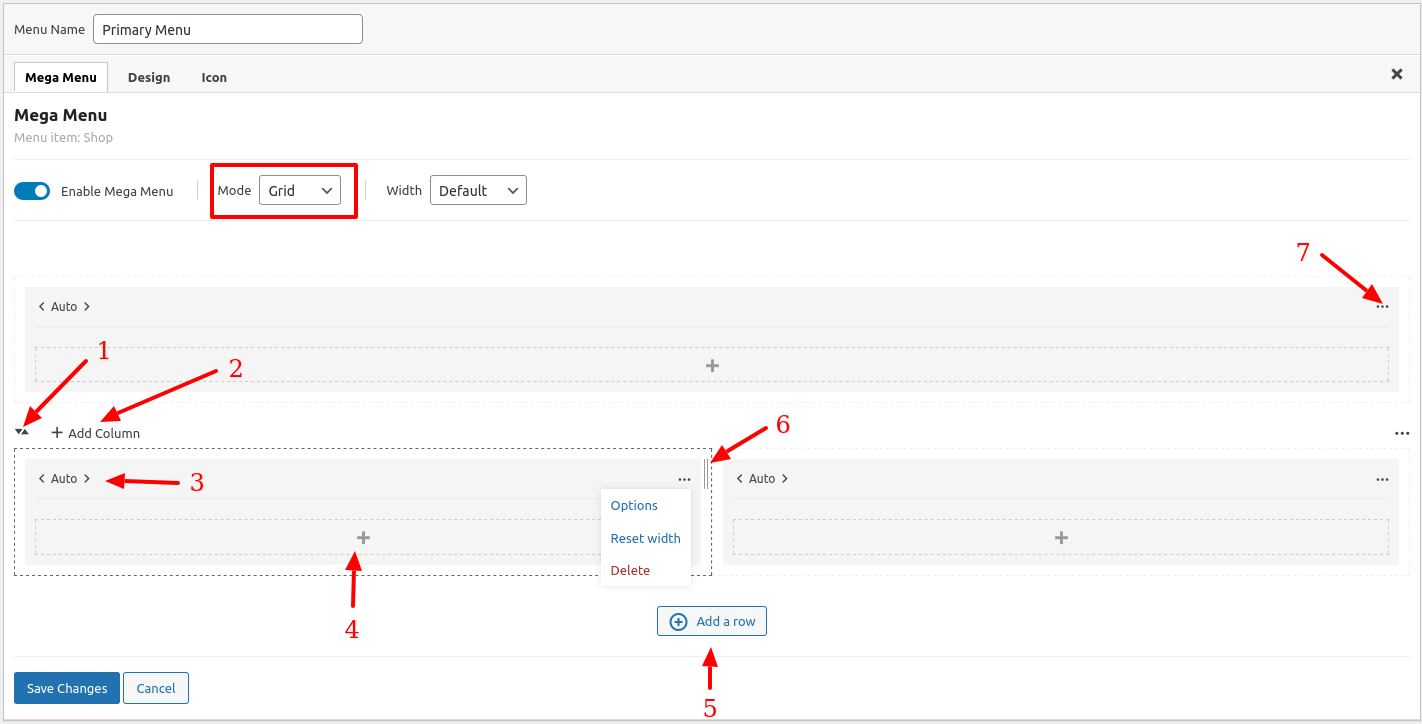
- Re-order the row positions.
- Add columns.
- Adjust the width of column.
- Add menu items for the column.
- Add New Row.
- Drag and drop to adjust the column width.
- Row options:
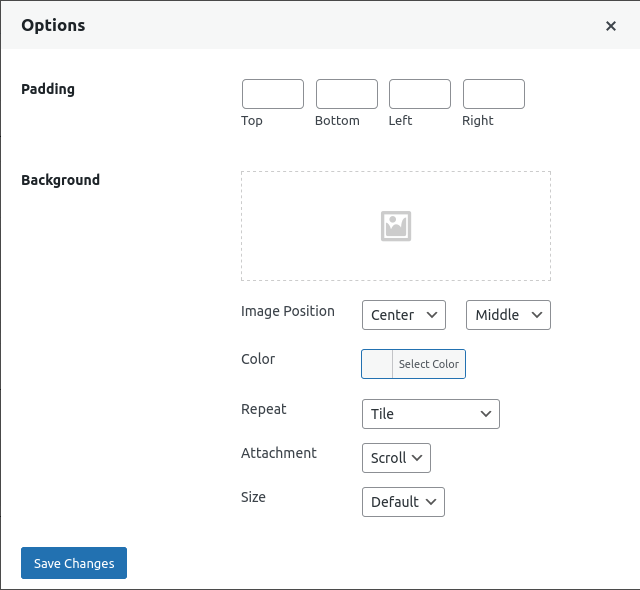
- Options
- Reset width
- Delete row
💡 Tip : You can set background image or can adjust padding of a row or column by selecting options from step 7
Mega Menu Mode ‘Tabs’ #
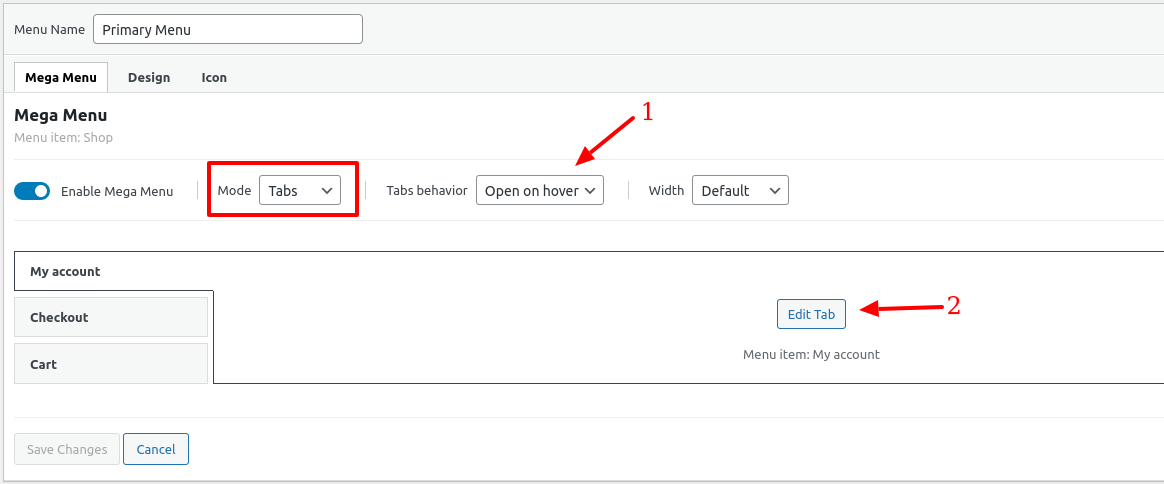
- List behavior
- Open on mouse hover
- Open on click
- Edit tab: Click on it to add Row and columns and add items into them.
🎨 Design Tab #
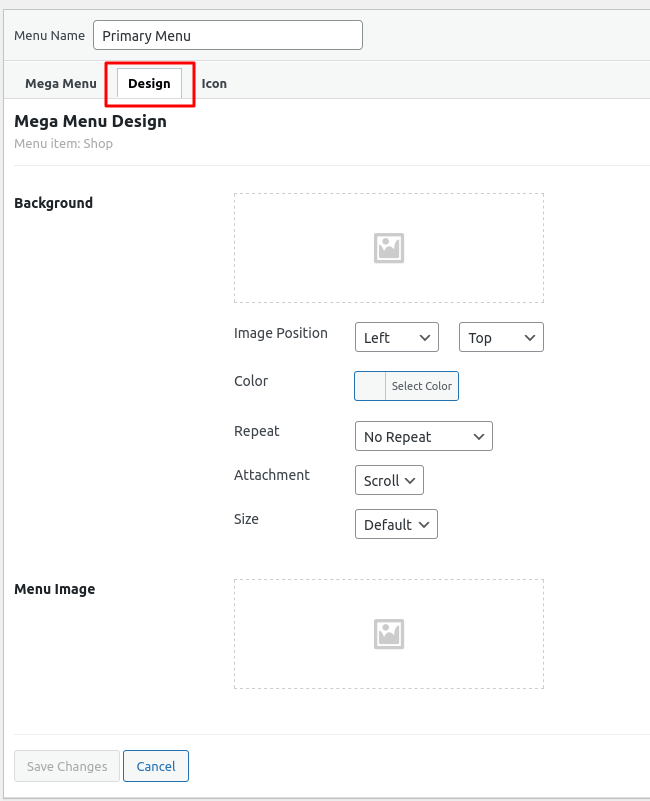
- Background: Set a background image for the menu item.
- Menu Image: Apply a background image to the mobile menu item.
🔧 Menu Icon #
Icon Settings
Here’s a clearer and more concise version:
Type:
- No Icon: No icon displayed.
- Theme: Choose an icon from the available theme icons.
- Image: Upload a custom image as the icon.
- SVG Code: Input custom SVG code for the icon.
Background Color: Set a background color for the icon.
Color: Choose a color for the icon.
Hide Text: Hide the menu title.
Menu Settings #
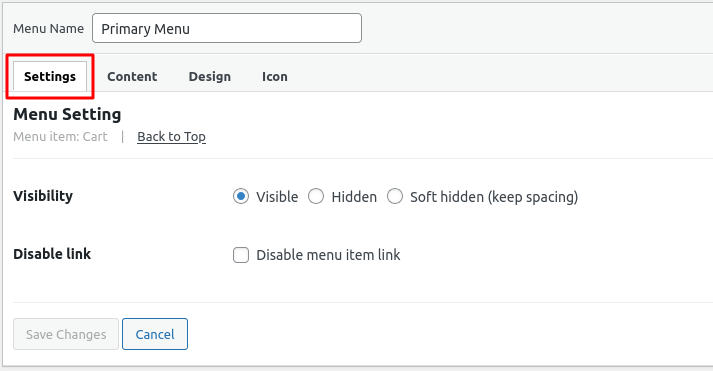
Note: This settings tab is only available for second-level menu items. It will not appear if the parent menu item uses the Tabs mode style.
Options:
- Visibility – Controls the visibility of the mega menu column label. Enabled by default.
- Disable Link – Removes the link from the mega menu column label.
Menu Content #
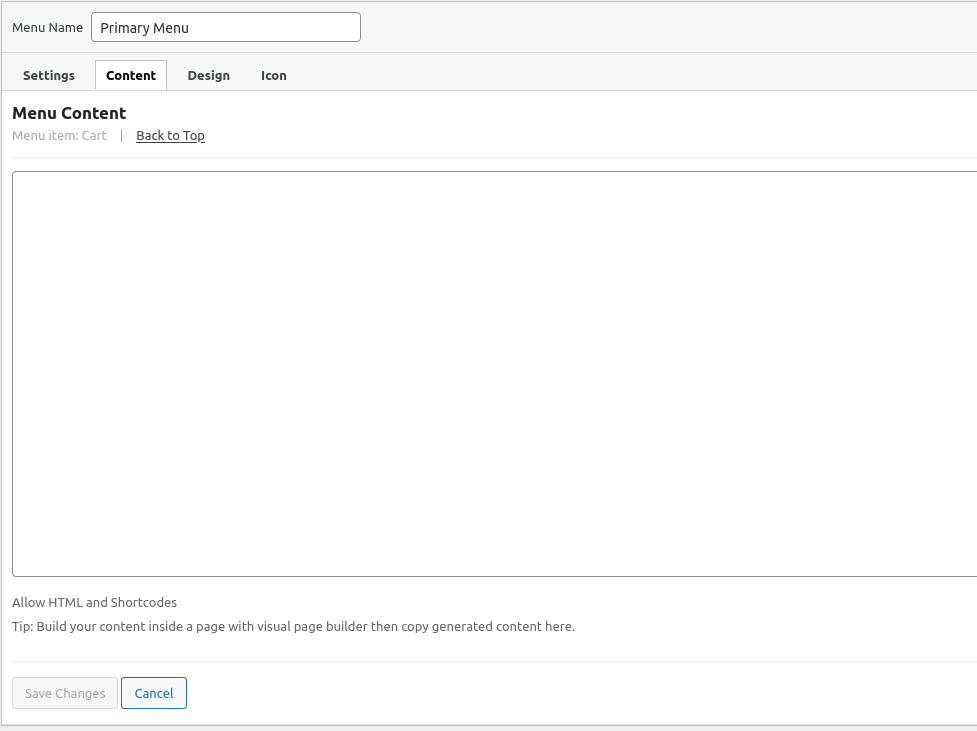
Starting from level 2 menu items and below, you can add custom HTML content. For example, you can hide the column label and display a banner image using HTML or a shortcode.
💡Tip: To create more complex mega menu content, consider designing it in a page using a visual page builder. Once you’re happy with the layout, simply copy the generated content and paste it here.
✅ Final Notes #
The mega menu builder is flexible and powerful. You can easily build complex layouts using the tabbed interface and grid builder. Save your changes and preview the menu on the frontend.