Skip to the content
Peregrine KnowledgebasePeregrine Knowledgebase
  • Go to website
  • Go to website
  • Yelp
  • Facebook
  • Twitter
  • Instagram
  • Email

How can we help you?

Popular Search socialheadersocial mediahowimage

Hester Pro

21
  • Theme Installation
  • Steps after Activating Hester Pro theme
  • Add widgets in sidebar or in Footer widget area
  • Enable front page sections
  • Home Sections
    • Slider Section
    • Info section
    • Service section
    • About section
    • Team section
    • Testimonial section
    • Pricing plan section
    • Call to Action section
    • Gallery section
    • Fun-facts section
    • Feature section
    • Steps to start section
    • Work history / timeline section
    • Workflow section
    • Clients section
    • Extra section
    • Design options

Bloglo Pro & BlogHash Pro common

2
  • Add social media profile links in header
  • Post Formats

ShopWell Pro

59
  • Download & Install ShopWell Addons Plugin
  • How to Install and Activate Required and Recommended Plugins
  • Import Demo
  • Configure Product Images in WooCommerce
  • ๐Ÿ”จ Product Archive Builder
  • ๐Ÿ› ๏ธ Single Product Builder
  • How to change homepage products in the ShopWell free theme?
  • Customizer
    • General
    • Styling
    • Typography
    • Topbar
    • Header
      • Topbar
      • Campaign Bar
      • Header Layout
      • Header specific pages
      • Overriding the Header on Specific Pages
      • Header Builder
      • Sticky Header
      • Header Background
      • Header Elements
        • ๐Ÿ” Configuring the Header Search in ShopWell Theme
        • ๐Ÿ‘ค Account
        • โค๏ธ Wishlist
        • ๐Ÿ”„ Compare
        • ๐Ÿ›’ Cart
        • ๐Ÿ“ Custom Text
        • Preferences ๐ŸŒ๐Ÿ’ฑ
        • View History
        • ๐Ÿ“Œ Primary Menu
        • ๐Ÿ“Œ Secondary Menu
        • ๐Ÿ—‚๏ธ Category Menu
        • ๐Ÿ” Hamburger Menu
      • Mega Menu
        • Mega Menu Vertical
        • ๐Ÿ” Mega Menu Hamburger
        • ๐Ÿงฉ Configure Mega Menu
        • Mega Menu Horizontal
    • Footer
      • Footer
      • Overriding the Footer on specific pages
  • Elementor
    • โš™๏ธ Elementor Basic Configuration Guide
    • Templates
    • ๐Ÿ“ข Popup Builder
    • ShopWell Builder
    • Widgets
      • ๐Ÿ›๏ธ Product Deals Grid / Carousel
  • Pages
    • ๐Ÿ“„ Creating a Page
    • โš™๏ธ Display Settings
  • Woocommerce
    • ๐Ÿ›’ Getting Started with WooCommerce
    • ๐Ÿ“„ WooCommerce Pages
    • ๐Ÿ›’ Customize the Checkout Page
    • ๐Ÿ“ฆ Create an Order Tracking Page
    • ๐Ÿ‘ค My Account Page Setup in WooCommerce
    • ๐Ÿ›๏ธ Catalog Mode
  • Shop
    • WishList & Compare
    • ๐Ÿ’ฑ Currency Settings
    • ๐Ÿ›๏ธ Shop Display
    • ๐Ÿงฉ Product Filters
  • Mobile
    • Topbar
    • Header
    • Footer
    • Miscellaneous
  • Translation
    • Quick Start Guide: TranslatePress

Blogsy Lite

14
  • Installation and Demo Import
  • Customizer : General Options
    • General (Logo, colors, typography and misc)
    • Top bar
    • Header & Footer
    • Blog page / Archive and Single Post
    • Sidebar
    • Breadcrumbs and Dark Mode
  • Customizer: Home sections
    • Highlight Breaking News with the Ticker Section
    • Hero Section โ€“ Featured Post Slider or Custom Hero Content
    • Stories
    • Featured Category
    • Featured Links
    • Posts You Might Like
    • Advertisement
  • Home
  • Docs
  • ๐Ÿ“„ Creating a Page
View Categories

๐Ÿ“„ Creating a Page

Creating pages is the foundation of building your website. With ShopWell, you can create as many pages as you needโ€”each fully customizable using WordPress or the Elementor builder.

๐Ÿ›  Steps to Create a New Page #

  1. Navigate to Pages โ†’ Add New
    From your WordPress dashboard, go to the sidebar menu and click Pages, then Add New.
  2. Add a Title
    Enter a name for your page in the title field. This will be used as the page heading and in your site’s navigation (if added).
  3. Select a Page Template
    In the Page Attributes panel (or Template dropdown), choose a layout from the available ShopWell page templates. Each template serves a different purposeโ€”like full-width layouts.
  4. Add Your Content
    Use the standard WordPress block editor to add text, images, or HTML content.
    Or click the Edit with Elementor button to design your page visually using drag-and-drop elements.
  5. Adjust Display Settings (Optional)
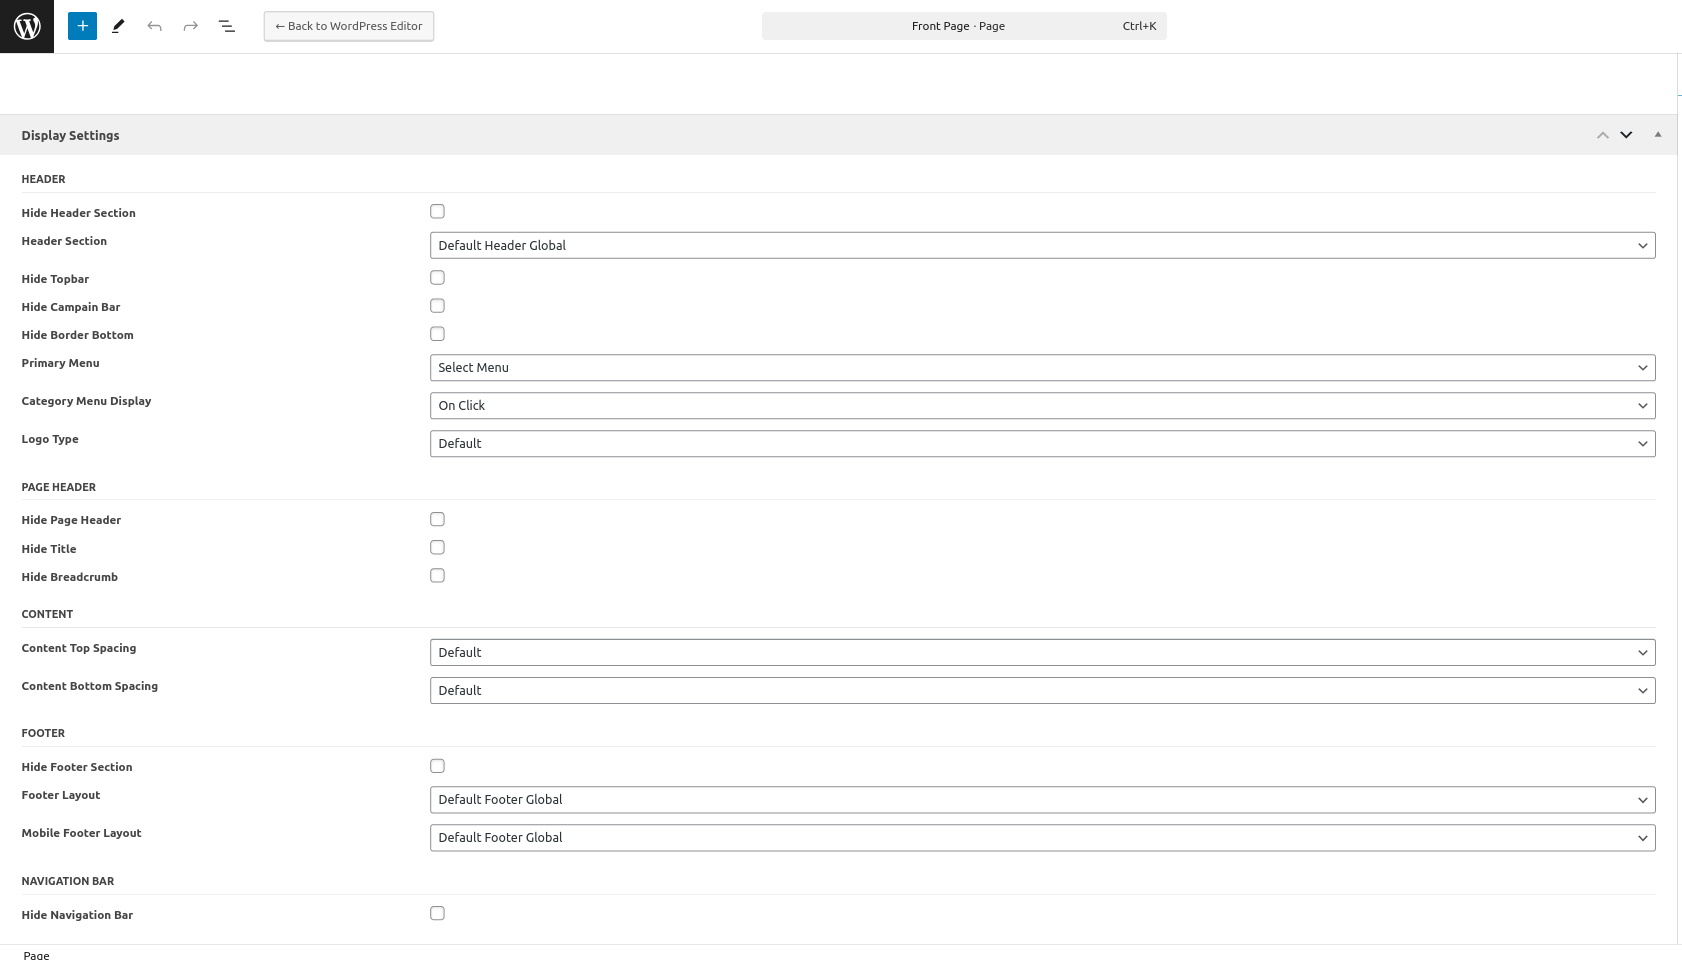
    Customize how this specific page looks using the Display Settings meta box below the editor. You can control visibility for headers, footers, breadcrumbs, and more. ๐Ÿ” For a full guide on these options, check out our Display Settings documentation.
  6. Publish Your Page
    Once you’re happy with the content and settings, click Publish to make your page live.

With these simple steps, you can build any kind of pageโ€”from homepages and contact pages to landing pages and product showcases.

โš™๏ธ Display Settings
Table of Contents
  • ๐Ÿ›  Steps to Create a New Page

© 2026 Peregrine Knowledgebase

Powered by WordPress

To the top ↑ Up ↑