Adding a Primary Menu to your site’s header helps visitors easily navigate your pages—whether it’s your homepage, shop, blog, or contact form. Follow this step-by-step guide to create and assign a primary menu in WordPress.

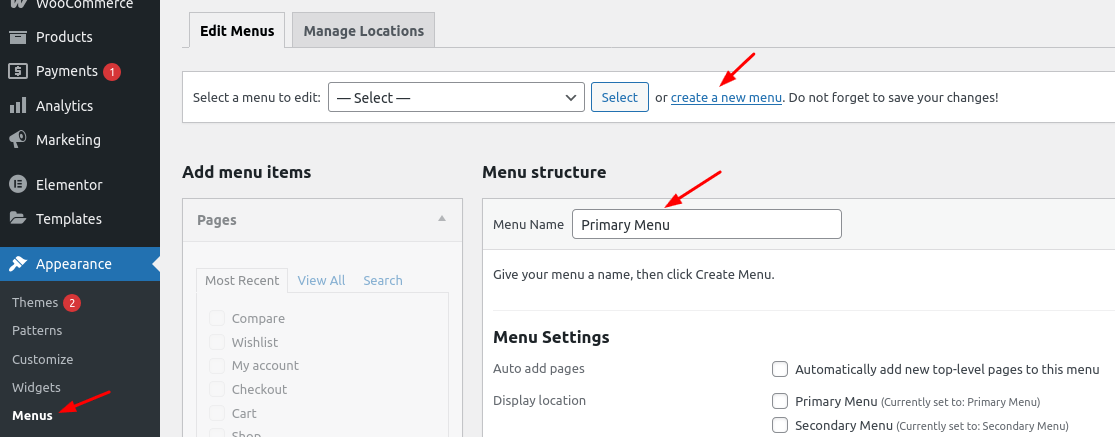
🧭 Step 1: Go to the Menus Section #
From your WordPress dashboard, head over to:
Appearance → Menus
This is where you’ll manage all your navigation menus.
➕ Step 2: Create a New Menu #
If you haven’t created a menu yet:
- Click “create a new menu”.
- Enter a name like “Primary Menu”.
- Click the Create Menu button.
This will open up the structure editor for your new menu.
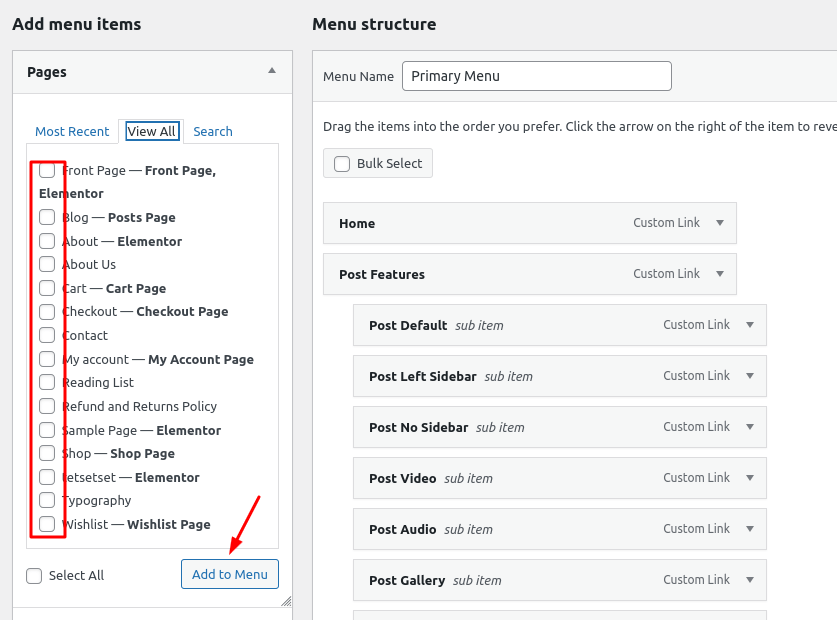
🧱 Step 3: Add Menu Items #
You’ll now see a list of available pages under the Pages panel.
- Click the View All tab to see all your pages.
- Check the boxes next to the pages you want to include.
- Click the Add to Menu button.
Your selected pages will appear in the Menu Structure panel.
🔀 Step 4: Organize Your Menu #
You can:
- Drag and drop to reorder items.
- Nest items to create dropdowns (submenus).
Arrange your links however you want them to appear in the header.
📍 Step 5: Set Display Location to “Primary Menu” #
Scroll down to Menu Settings. Under Display location, check the box labeled Primary Menu.
This tells WordPress to show this menu in the header area of your theme.
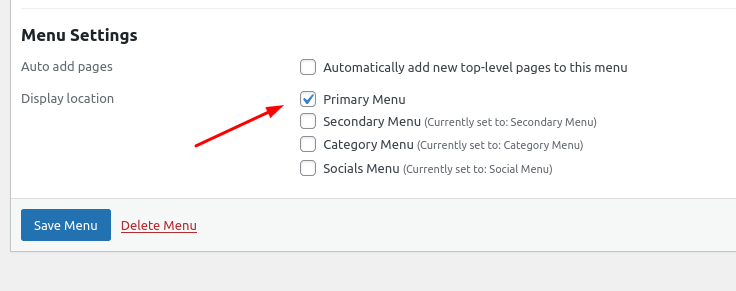
💾 Step 6: Save the Menu #
Don’t forget to click the Save Menu button to apply your changes.
You should now see your navigation menu live in the header of your website!
📚 Need More Help? #
Explore the full WordPress Menu User Guide for more details on using custom links, categories, and menu organization.